A paper bag isn’t on my list of top cooking tools, but when I heard about using one for a better apple pie, I was intrigued. Could stuffing my pie in a paper bag really be the way to make the best version of a beloved dessert?
To find out, I made our Apple Pie in a Brown Paper Bag recipe both with the bag and without, and here’s what I discovered.
Using Paper Bags in Cooking
The use of paper for cooking food isn’t a new concept. A popular French technique where food is cooked “en papillote” or “in paper,” has been around for centuries. Classic en papillote preparations include fish and other delicate proteins and vegetables that are securely wrapped in parchment packets before baking. When ingredients are baked in the pouch, steam is allowed to build which gently cooks the food. It’s a hands-off approach that’s perfect for cooking somewhat intimidating dishes.
Flash forward a few hundred years to the 1800s when the brown paper bag was newly invented. It was originally envelope-style, instead of the flat-bottomed bags we use most often today. That made it handy for books and papers—and apparently for cooking food. Or so the authors of “Every Woman’s Encyclopedia” thought, dedicating a section of the book to the “The ABC of Paper Bag Cookery.”
Why Cooking in Paper Works
The paper bag section of the book highlights why using this technique is helpful. It’s clean (everything is cooked in a bag that gets tossed), it’s a time-saver (it requires little hands-on time), and it locks in nutrients (thanks to the sealed bag). But these aren’t necessarily important when it comes to cooking pie, so what are the benefits there?
The bag serves two purposes. First, it protects the crust and topping from burning and second, it evenly bakes the pie using steam to yield soft, fork-tender apples.
Does a Paper Bag Work to Make Better Pie?
I made two pies using our recipe for Apple Pie in a Brown Paper Bag. I placed one pie in a parchment packet to simulate a paper bag, and I placed the second, uncovered, on a baking sheet. I baked both pies for 1 hour. The only difference was that I baked the paper bag pie at 400 degrees F the entire time whereas I baked the other for 20 minutes at 400 degrees F before covering (to prevent the crust and topping from burning) and reducing the temperature to 375 degrees F to continue baking for another 40 minutes.
Side-By-Side Results

Sara Haas
I liked both pies. Maybe that’s a function of adoring the dessert, in general, but I thought they both turned out delicious. There were noticeable differences though, which are worth noting.
The paper-bagged pie was a breeze to cook, especially once I got the parchment arranged and secured around it, which was a bit of a task. It was also handy to be able to throw it in the oven and not have to think about it again until I opened the oven door.
The traditional pie required a bit of babysitting since I had to cover the top and drop the temperature of the oven.
The paper bag crust and topping were evenly browned whereas the other pie wasn’t as consistently colored, and was mottled with dark and light spots. As for the filling, the paper-bag apples were tender and seemed to almost melt when eaten. The apples in the other pie were a little more firm and the ingredients didn’t seem to meld like those in the paper bag.
Tips for Making Paper Bag Pie

Sara Haas
Tip 1: Use a paper bag that doesn’t have any coating or ink. A large flat-bottomed version will work best. If you’re hesitant to use a paper bag, large sheets of parchment paper can also do the trick.
Tip 2: Secure and seal everything properly. The bag or parchment should not touch the top or sides of the pie, so allow for ample room before sealing. Since this method relies on steaming, also be sure to seal your bag or parchment well, without any gaps or holes. If folding doesn’t get the job done, use a stapler or metal (uncoated) paper clips to close any gaps.
Tip 3: Choose a recipe with a crumble crust. A double-crust pie will work using the brown paper bag method, but to simplify things and keep things beautiful, opt for a crumble.
Tip 4: Remember that the bag is hot and full of steam, so let it sit for a bit before opening. Open just a bit (away from your face) to allow steam to escape before opening fully.
The Bottom Line
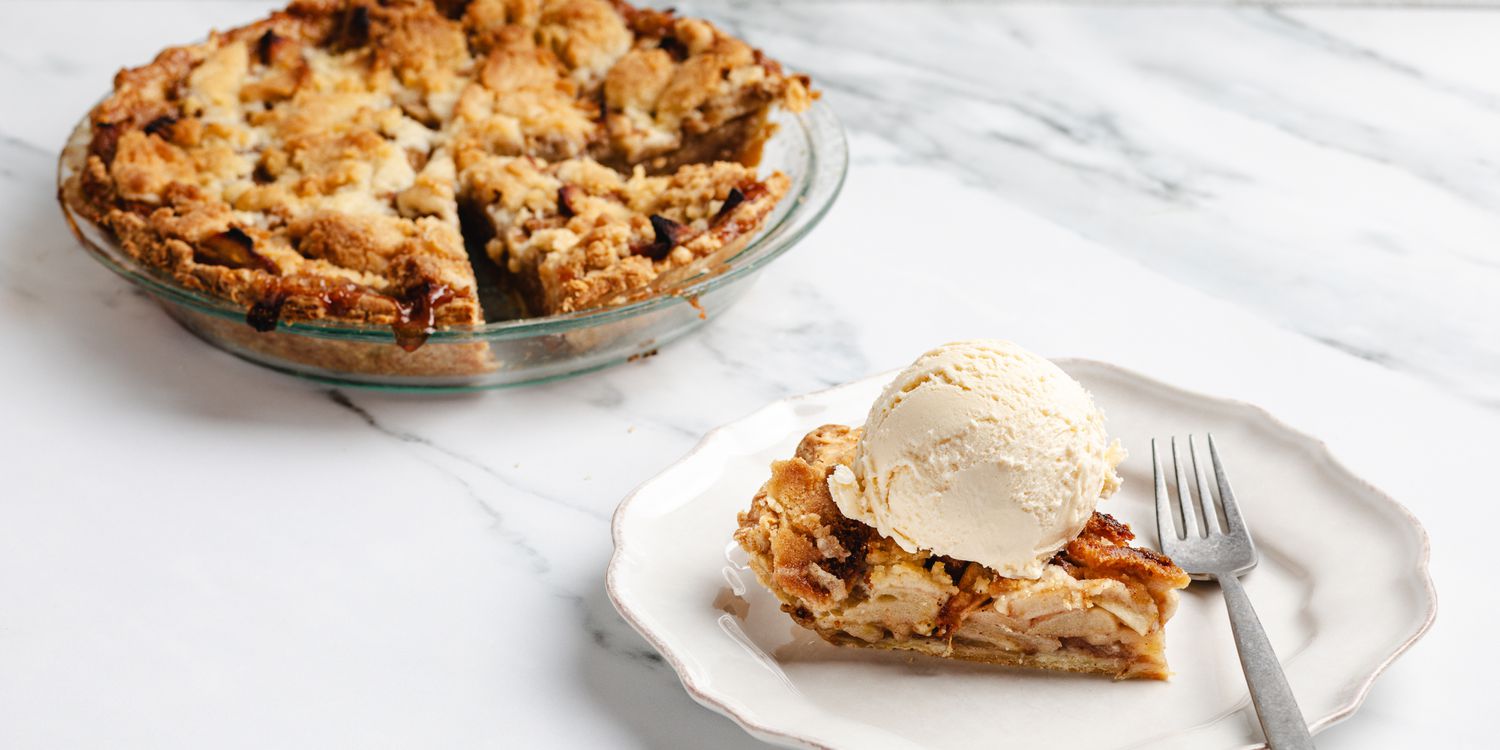
I’d make this pie again using the paper bag technique. I liked not having to worry about my pie as it was cooking. I also enjoyed the results and the flavor. It’s definitely a recipe worth giving a try!
Get the recipe: Apple Pie in a Brown Paper Bag